Do not open the aluminium bag before the pipe is prepared for repair. It is crucial to put on the gloves (included) and safety glasses (not included) while applying the product.
YOU WILL NEED: a small container of water, a file or sandpaper.
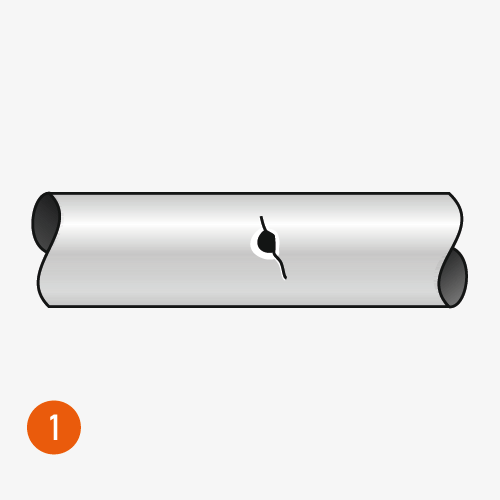
1. Repair procedure without pipe flow
Step 1:
Turn the water supply off.
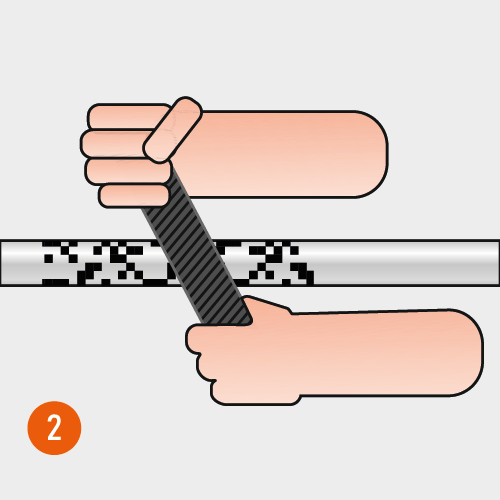
Step 2:
Dull the surface that is to be repaired using a file or sandpaper. In case of PVDF, polyethylene and polypropylene pipes, use a saw blade to get the chequered pattern required.
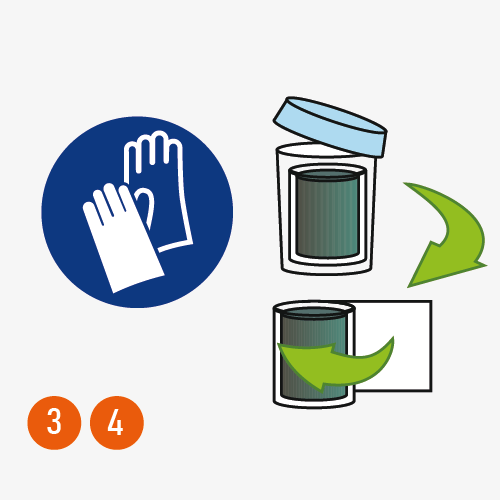
Step 3:
Put on the latex gloves.
Step 4:
Take the epoxy putty out of the sealed plastic bag. Remove the protective film.
Step 5:
Mold the epoxy putty until it is smooth and dark grey and until it becomes warm (approx 20 seconds).
Step 6:
Apply the epoxy putty to the leak so that it fills the holes and cracks.
Step 7:
Fill the prepared container with water.
Step 8:
Rip the aluminium bag apart along the incision. Take out the bandage and dip it in the water for 5 seconds. Squeeze firmly the roll of bandage twice and take it out of the water.
Step 9:
Apply it quickly because the time of application is max. 2 minutes. Wrap the bandage tightly and carefully around the surface under repair. Use the entire roll of bandage.
Step 10:
Tear off the plastic tube from the end of the roll.
Step 11:
Dip the gloves in water and quickly press the resin bubbles back into the bandage wrapped surface, smoothing the area with precise backward and forward movements.
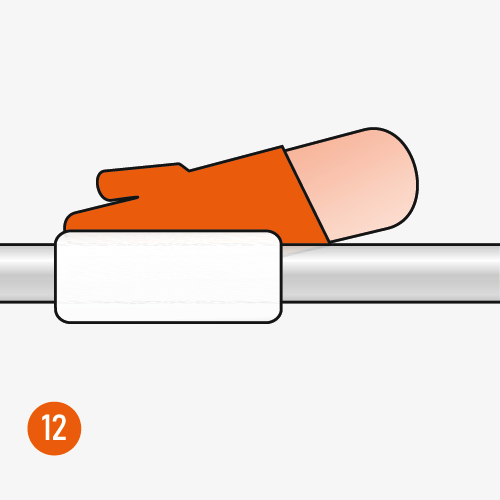
Step 12:
Smooth the wrapped bandage until no bubbles appear (approx. 3 to 5 minutes). After application, the entire part of the repaired pipe should be smooth and ivory in colour.
ATTENTION
The pipe repair kit is best applied to rough surfaces. Remove any loose rust from the pipe before application.
A couple of rolls of bandage can be applied in one place if needed. (refer to measurement table).
In case of leakage at tee-joint, shape the epoxy putty in your hands into a thin roll and wrap it around the tee-joint. Use your fingers to press the putty evenly onto the joint before applying the bandage. It is important that putty fills the gap around the tee-joint completely in order to apply the bandage tightly.
2. Repair procedure with pipe flow
Step 1:
The repair kit can be installed if the leakage pressure does not exceed approx. 1,3 bar.
Step 2:
Dull the surface that is to be repaired using a file or sandpaper. In case of PVDF, polyethylene and polypropylene pipes use a saw blade to get the chequered pattern required.
Step 3:
Put on the latex gloves.
Step 4:
Take the epoxy putty out of the sealed plastic bag. Remove the protective film.
Step 5:
Mold the epoxy putty until it is smooth and dark grey and until it becomes warm (approx 20 seconds).
Step 6:
Apply the epoxy putty to the leak so that it fills the holes and cracks.
Step 7:
Fill the prepared container with water.
Step 8:
Rip the aluminium bag apart along the incision. Take out the bandage and dip it in the water for 5 seconds. Squeeze firmly the roll of bandage twice and take it out of the water.
Step 9:
Apply it quickly because the time of application is max. 2 minutes. Wrap the bandage tightly and carefully around the surface under repair. Use the entire roll of bandage.
Step 10:
Tear off the plastic tube from the end of the roll.
Step 11:
Dip the gloves in water and quickly press the resin bubbles back into the bandage wrapped surface, smoothing the area with precise backward and forward movements.
Step 12:
Smooth the wrapped bandage until no more bubbles appea (approx. 3 to 5 minutes). After application the entire part of the repaired pipe should be smooth and ivory in colour.
ATTENTION
The pipe repair kit is best applied to rough surfaces. Remove any loose rust before application.
A couple of rolls of bandage can be applied in one place if needed. (refer to measurement table).
In case of leakage at tee-joint, shape the epoxy putty in your hands into a thin roll and wrap it around the tee-joint. Use your fingers to press the putty evenly onto the joint before applying the bandage. It is important that putty fills the gap around the tee-joint completely in order to apply the bandage tightly.


